
Halloween is just around the corner, and it’s the perfect time to get creative with your nails. From spooky designs to glamorous finishes, Halloween nails are a fun way to express your festive spirit. Whether you’re a fan of classic spooky designs or prefer something a bit more glamorous, this guide will help you nail your Halloween manicure this year.
Understanding Halloween Nail Trends
Halloween nails have become a significant trend over the years, with designs ranging from cute and spooky to downright terrifying. The beauty of Halloween nails lies in their versatility—whether you want a subtle nod to the holiday or a bold, attention-grabbing design, there’s something for everyone.
Classic Halloween Colors
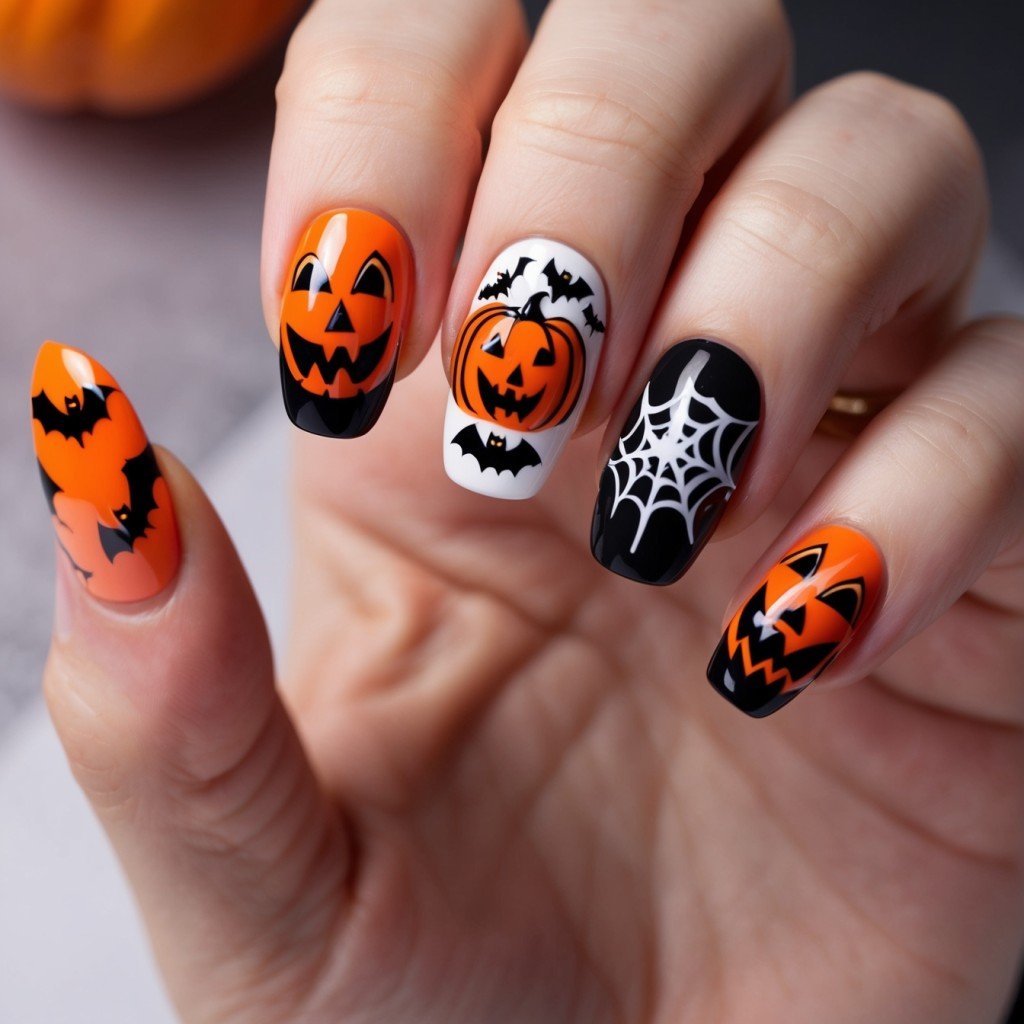
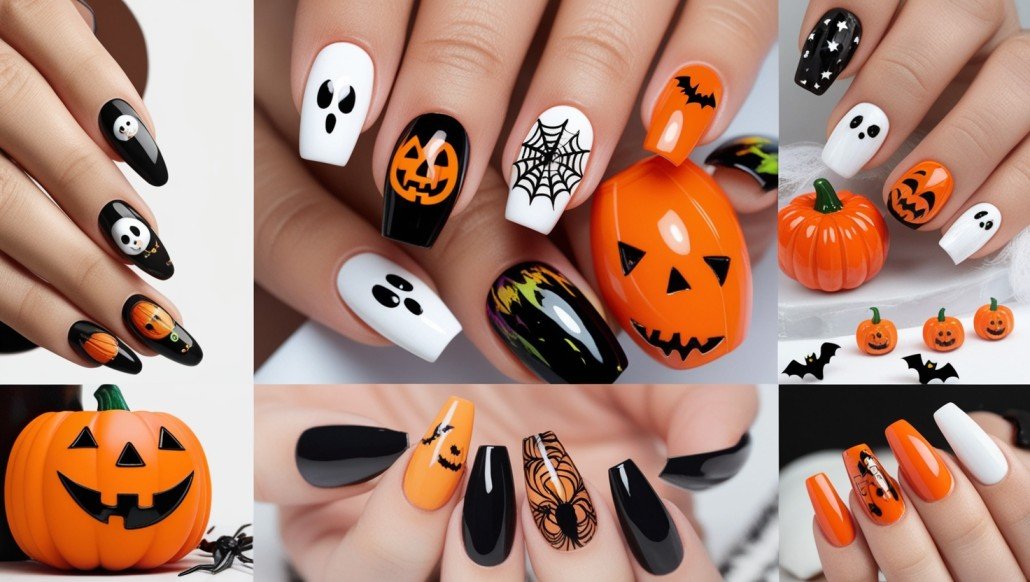
When it comes to Halloween nails, certain colors immediately evoke the holiday spirit. Black, orange, purple, and green are the go-to shades for any Halloween-inspired manicure. These colors can be used as a base or incorporated into detailed designs like spider webs, jack-o’-lanterns, or haunted houses.
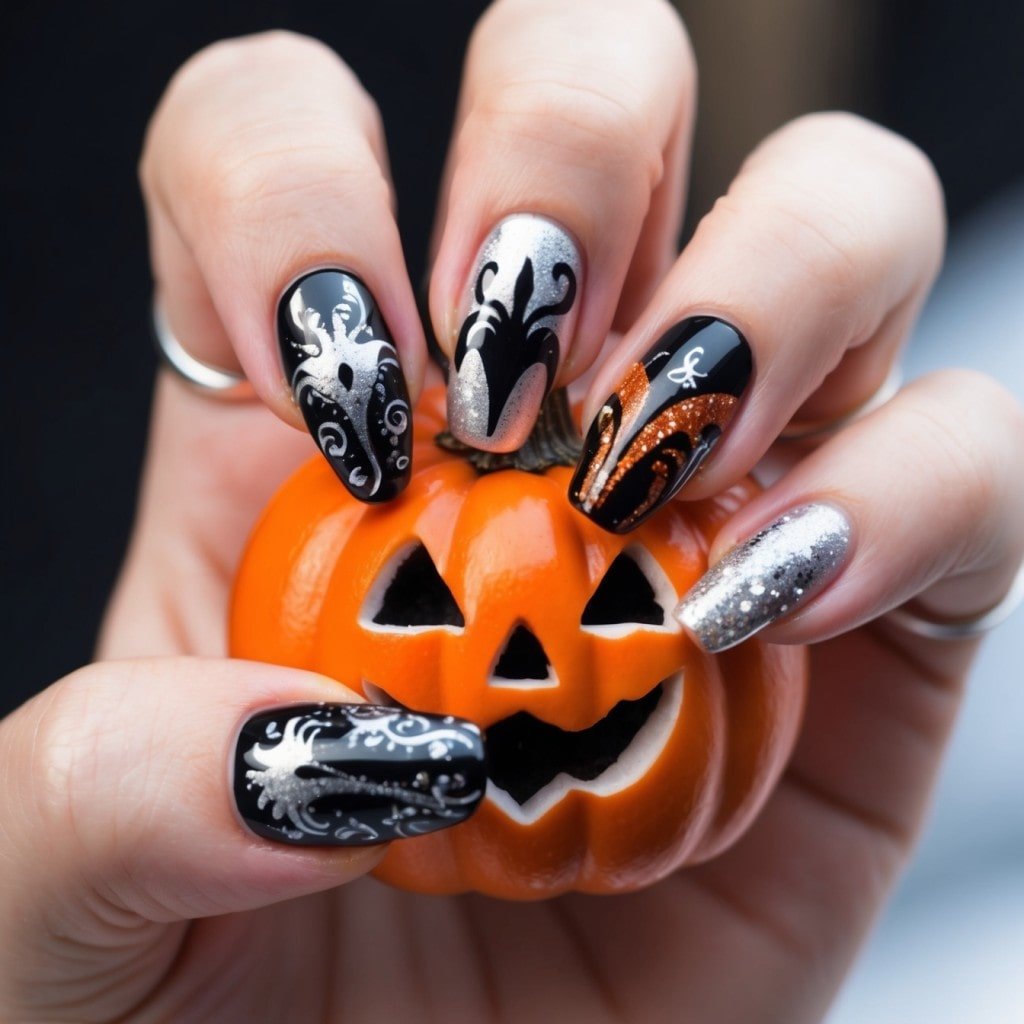
For those who prefer a more sophisticated look, consider a matte black finish with glossy black accents, or combine deep purple and glitter for a bewitching effect. These classic shades set the tone for your Halloween manicure and serve as the perfect canvas for more intricate designs.
Spooky and Fun Halloween Designs
If you’re looking to have some fun with your Halloween nails, the design options are endless. From ghosts and goblins to pumpkins and candy corn, there are countless ways to get creative. For a playful yet spooky look, try incorporating cute ghosts, friendly spiders, or colorful candy corn into your nail art.
For a more detailed approach, consider creating miniature haunted houses, creepy cats, or witchy motifs on your nails. These designs not only capture the spirit of Halloween but also allow you to showcase your creativity.
DIY vs. Professional Halloween Nails
When it comes to Halloween nails, you have two main options: creating your own designs at home or visiting a professional nail artist. Both approaches have their benefits, depending on your skill level and the complexity of the design you want.
DIY Halloween Nails
Creating your own Halloween nails at home can be a rewarding experience. With a bit of practice and the right tools, you can achieve impressive designs that will turn heads. Here are some tips for a successful DIY Halloween manicure:
- Start with a good base coat: This helps to protect your nails and ensures that your design lasts longer.
- Use nail art brushes: These fine-tipped brushes allow you to create detailed designs like spider webs, bats, or intricate pumpkins.
- Try nail stickers or decals: If you’re not confident in your freehand skills, nail stickers or decals are a great way to achieve a professional look with minimal effort.
- Invest in a top coat: A high-quality top coat will seal in your design and add a glossy finish, making your nails look polished and professional.
DIY Halloween nails are a great option if you enjoy experimenting with different designs and have the time to dedicate to your manicure. Plus, it’s a fun way to get into the Halloween spirit!
Professional Halloween Manicure
If you’re looking for something more intricate or simply want to treat yourself, a professional Halloween manicure might be the way to go. Nail artists have the expertise and tools needed to execute complex designs that may be difficult to achieve at home.
When visiting a nail salon for your Halloween manicure, here are a few things to keep in mind:
- Bring inspiration: Whether it’s a photo from Instagram or a design you’ve dreamed up, having a clear idea of what you want will help your nail artist create the perfect look.
- Consider your nail length: Some designs work better on longer nails, while others are perfect for shorter nails. Discuss this with your nail artist to find the best design for your nails.
- Ask about longevity: If you need your Halloween nails to last through multiple events, consider asking for gel polish or an acrylic overlay to extend the life of your manicure.
A professional Halloween manicure is an excellent choice if you’re short on time or want a flawless finish. It’s also a great way to achieve more elaborate designs that require precision and expertise.
Essential Tools and Products for Halloween Nails
Whether you’re doing your nails at home or heading to a salon, having the right tools and products is crucial for achieving the perfect Halloween manicure.
Nail Polish
Choosing the right nail polish is the first step in creating your Halloween nails. For the best results, opt for highly pigmented colors that apply evenly and dry quickly. Brands like OPI, Essie, and Sally Hansen offer a wide range of Halloween-appropriate shades, from classic black to glittery oranges and purples.
Nail Art Brushes
Fine-tipped nail art brushes are essential for creating detailed designs. These brushes allow you to draw precise lines and intricate patterns, such as spider webs, skeletons, or tiny ghosts. If you’re new to nail art, consider practicing on a piece of paper or a plastic nail tip before attempting your design on your nails.
Nail Stickers and Decals
For a quick and easy Halloween manicure, nail stickers or decals are a fantastic option. These come in various designs, from simple pumpkins to elaborate haunted houses, and can be applied in minutes. They’re perfect for those who want a professional-looking manicure without spending hours on it.
Glow-in-the-Dark Nail Polish
To add an extra layer of spookiness to your Halloween nails, consider using glow-in-the-dark nail polish. This polish is perfect for Halloween parties or trick-or-treating, as it makes your nails visible even in the dark. Combine it with classic Halloween designs for a truly eerie effect.
Glow-in-the-Dark Nail Polish for Halloween Nails
One of the easiest ways to make your Halloween nails stand out is by using glow-in-the-dark nail polish. This unique product is perfect for adding a spooky twist to your manicure and ensures your nails will be noticed even in the darkest of settings.
How to Apply Glow-in-the-Dark Nail Polish
Applying glow-in-the-dark nail polish is similar to using regular polish, but there are a few tips to keep in mind:
- Start with a white base coat: This helps the glow-in-the-dark polish stand out more and intensifies the glowing effect.
- Apply multiple coats: To achieve the best glow, apply at least two to three coats of the glow-in-the-dark polish.
- Charge your nails: To activate the glow, hold your nails under a bright light for a few minutes before heading out. This will ensure they glow brightly in the dark.
Glow-in-the-dark polish can be used alone or in combination with other designs. For example, you can create a spooky spider web on one nail and make it glow, or paint all your nails with a solid glow-in-the-dark color and add spooky accents on top.
Quick and Easy Halloween Nail Ideas
If you’re short on time but still want to get into the Halloween spirit, here are some quick and easy Halloween nail ideas that you can do at home:
Black and Orange Stripes
For a classic Halloween look, paint your nails with alternating black and orange stripes. This simple design is festive and easy to achieve with just two colors of nail polish and a striping brush.
Glittery Spider Webs
Create a glittery base with silver or black glitter polish, then use a fine-tipped brush to draw spider webs over the top. This design is perfect for adding a touch of glamour to your Halloween nails.
Candy Corn Nails
Paint your nails in the colors of candy corn—yellow at the base, orange in the middle, and white at the tip. This fun and festive design is perfect for Halloween and works well on both short and long nails.
FAQs About Halloween Nails
What are the best colors for Halloween nails?
The best colors for Halloween nails are typically black, orange, purple, and green. However, you can also experiment with metallics, pastels, or even glow-in-the-dark shades for a unique twist.
Can I create Halloween nails at home?
Yes, you can create Halloween nails at home using basic tools like nail polish, brushes, and stickers. There are plenty of tutorials available online to help you achieve various designs.
How long do Halloween nails last?
The longevity of your Halloween nails depends on the quality of the products used and how well they are applied. A professional manicure can last up to two weeks, while DIY nails may last about a week.
Should I use gel or regular polish for Halloween nails?
Gel polish typically lasts longer and provides a glossier finish, making it a great option for Halloween nails that need to last through multiple events. However, regular polish is easier to remove and allows for more frequent design changes.
What are some quick Halloween nail ideas?
If you’re short on time, consider simple designs like black and orange stripes, glittery nails with a single spooky accent, or using Halloween-themed nail stickers.
Where can I find inspiration for Halloween nail designs?
You can find inspiration for Halloween nails on platforms like Pinterest, Instagram, or YouTube. Nail salons often showcase seasonal designs as well.
Conclusion
Halloween nails are a fantastic way to express your creativity and get into the spirit of the season. Whether you opt for a DIY approach or visit a professional nail artist, the possibilities are endless. With the right tools, products, and inspiration, your Halloween nails can become the perfect accessory to your costume or a stylish statement all on their own. Get ready to have the spookiest, most stylish nails this Halloween!
5 Comments